
Turn Your Halloween Pumpkin Photo Into a Color by Number Puzzle
Turn a Halloween pumpkin photo into a numbered pixel puzzle in Pixfun, with a worked example, square-crop tips and advice for keeping carved faces clear.
By Paweł Tymczuk ·
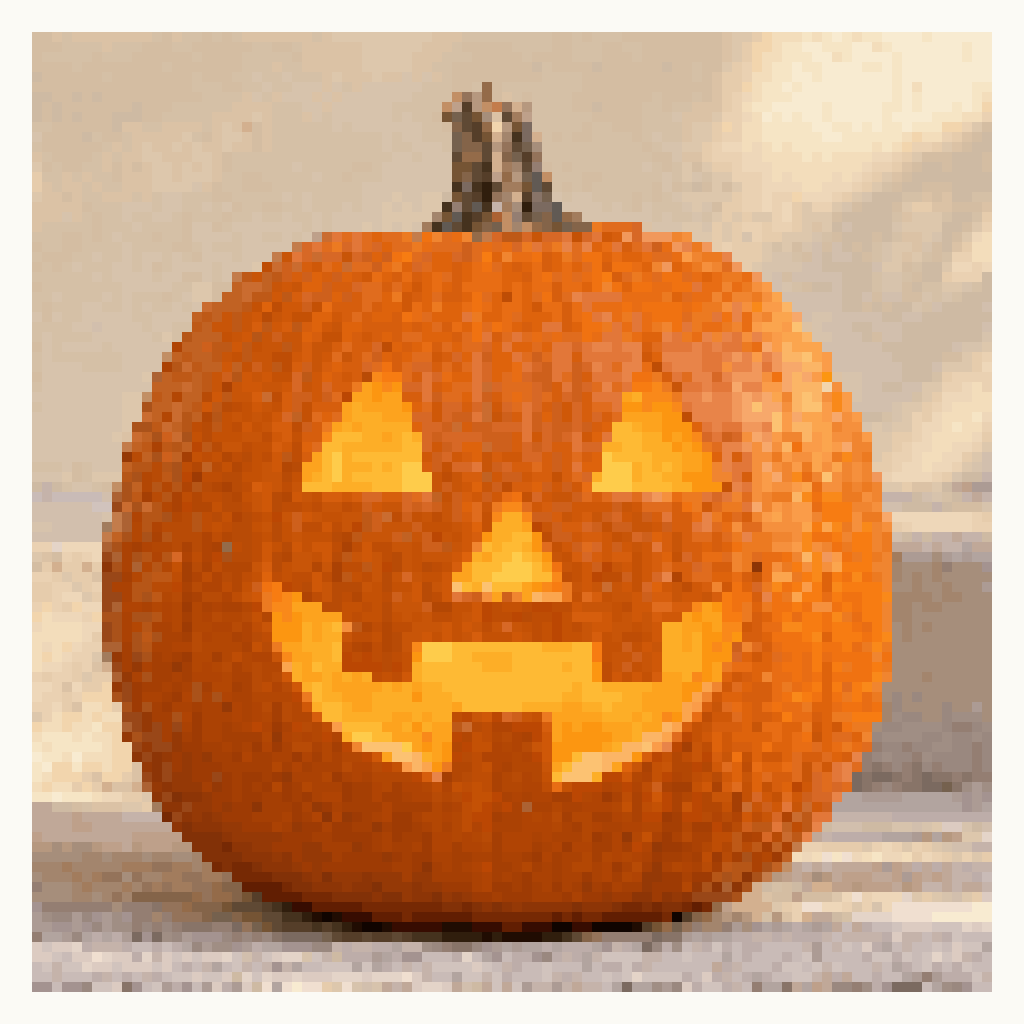
You can turn a Halloween pumpkin photo into a color by number puzzle in Pixfun. Choose a close photo with a visible carved face, crop it to a square in Photos if needed, then open Studio → Camera and check the pixel preview before saving. A clear orange outline and distinct eyes and mouth give you a picture that's easier to recognize as you color.
A pumpkin you've carved, a little porch decoration or a favorite jack-o-lantern expression can become the subject of your next coloring session. The carving doesn't need to be elaborate. Broad triangular eyes and a simple smile often give a small picture more character than lots of tiny cutouts.
Which pumpkin photograph should you choose?
Look at the photo as a small thumbnail before choosing it. Can you still make out the eyes and the shape of the smile? If the face disappears when the picture is small, it deserves more room in the frame.
A useful starting image has three things:
- A large face. The pumpkin fills much of the picture, with a little space around its stem and edges.
- Visible orange skin. You can see the pumpkin's body as well as the light in its carved openings.
- A quiet background. A step, wall or uncluttered patch behind it keeps the subject easy to find.
In our example, one orange pumpkin sits on a pale stone step. Its golden eyes and mouth stand out against the orange body, while the lighter wall gives the outer shape a clear edge. Those broad areas still read as a friendly face after conversion.
Start with one pumpkin before trying a crowded row. A porch photo with pumpkins, string lights and several ornaments may be lovely to keep, but a closer view gives one expression more of the coloring picture. If you already have a wide photo, try a crop around your favorite face before taking another.
How do you keep the glow without losing the pumpkin?
A glowing jack-o-lantern against a dark porch can look striking. For a coloring picture, you also want enough light to see the pumpkin around that glow. Otherwise, its eyes and smile can turn into yellow shapes floating in a dark square.
Try a second photo while there's still some light in the sky, or use a nearby porch light to reveal the orange skin. Compare it with the darker frame. Keep the one where you can see the carved expression, the ridges around it and the outline against the background.
This follows Canon's Halloween photography advice: balance the light inside the jack-o-lantern with enough exterior light to show its detail.
Hold the phone steady and inspect the saved photo before moving on. If your phone has a suitable low-light mode, use it in the phone's Camera app and import the picture afterward. Check that the mouth hasn't become one bright patch with its teeth lost inside it.
You can also choose a daylight photo. A clearly visible face and bright orange body make a useful starting point even without a dramatic night scene. The preview will help you decide which version you would enjoy coloring.
Why should you crop before importing?
Pixfun photo mode takes a square from the center of the image during conversion. In a wide porch photo, a pumpkin near the edge may fall partly outside that square. Preparing the crop first helps you keep the whole expression.
Open the picture in your phone's Photos app and try a square crop. Place the pumpkin where you want it, with its eyes, mouth, stem and outer shape inside the frame. Leave a little breathing room above the stem and beside the cheeks. You want a close view without accidentally clipping part of the pumpkin.
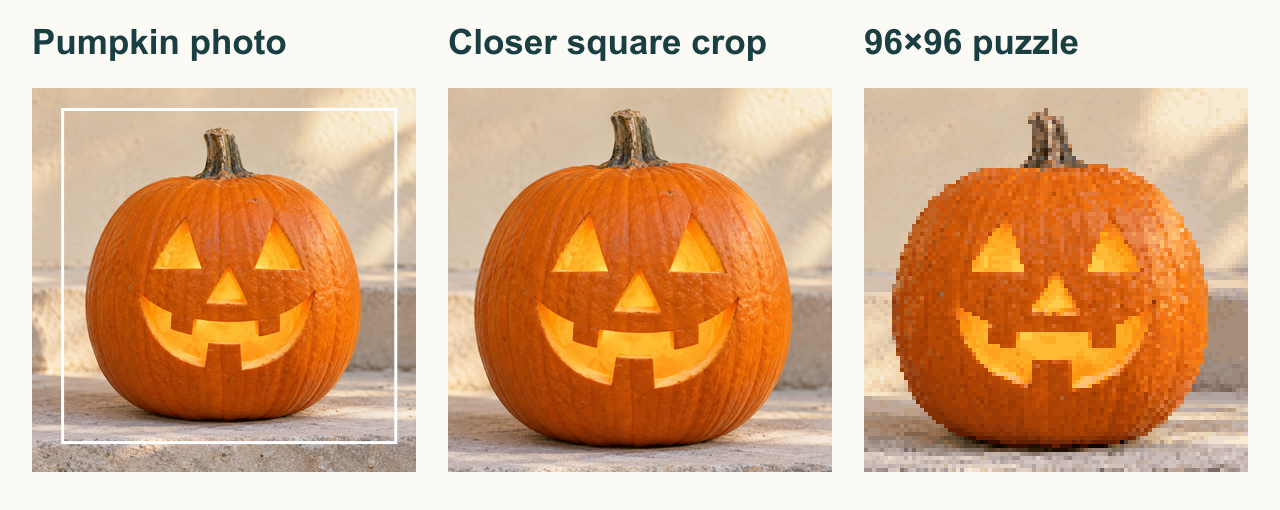
Illustrative example: the source photo was created with AI; the pixel version was made with Pixfun's photo-conversion code.
The white box marks the closer crop in this example. It keeps the full stem and smile while giving the pumpkin more space in the square. The finished pixel picture retains that composition, including the golden openings and the pale step beneath it.
Compare your crop with the original at a small size. If both are equally recognizable, the wider crop may give you a background you like. If the face is much clearer in the closer version, use that one. Make this framing choice in Photos before importing into Pixfun.
How do you make the Halloween coloring puzzle?
Once you've chosen the photo and crop, you're ready to make the puzzle:
- Open Studio and choose Camera. This opens Photos to Pixel, where you can take a new picture or choose one from your library.
- Choose the prepared photo. Select your square crop if you made one in Photos. Allow photo-library access when needed to pick the picture.
- Compare the pixel preview. Move the slider between its Easy and Hard ends. Watch whether the eyes stay separate and the smile keeps its shape. Photo mode supports a grid range from 16×16 to 96×96.
- Use Save & continue. This saves the photo puzzle on the current device and opens it for coloring.
- Choose a palette color and fill its matching cells. Zoom in around the eyes, teeth and stem when you want a closer view.
Start coloring wherever the picture makes sense to you. Filling a broad orange area establishes the pumpkin's body; the golden cells bring out the expression. Selecting a color highlights its matching cells, so you can work through one color or concentrate on a small area.
You can pause and return to the saved puzzle. There are no timers or move limits. For more detail on the controls, see our photo-to-pixel-art guide and pixel art coloring guide.
What will the numbered picture look like?
The photograph becomes square cells with a prepared palette. Similar tones may share one color, while other differences remain separate. The orange body, golden openings and pale stone step become groups of cells you fill by their matching numbers.
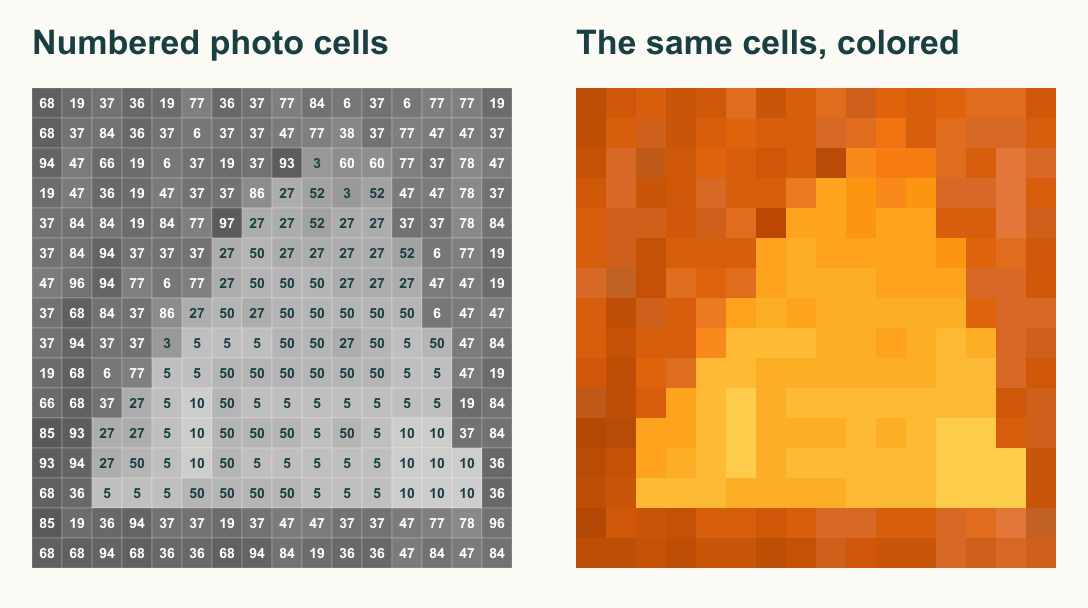
A 16×16 detail of the pumpkin's eye. Each number corresponds to the same palette color in both panels.
The close-up shows how a triangular eye is built from a stepped edge of square cells. You don't need every mark on the pumpkin's skin for the expression to read clearly. The broad eye shape and its contrast with the orange around it do much of that work.
This example uses 96×96 to retain the carved shapes and some surface texture. Your photo may look good at a different point on the slider. A closer crop can make a bigger difference than choosing the largest grid, especially when the pumpkin was small in the original frame.
Use the preview to choose a picture you want to spend time with. Lots of similar orange shades can ask for more attention than a simpler pattern. Notice both how clearly the face reads and how much small detail there is around it.
What if the face is hard to recognize?
Look at the original photo and the preview together. If something is already missing from the photo, a larger grid can't recover it. Use the problem you can see to choose the next adjustment:
| What you see | What to try |
|---|---|
| Eyes and mouth float in a black square | Use a photo with enough exterior light to show the pumpkin's orange body. |
| The pumpkin is tiny among porch decorations | Crop closer in Photos and give one face most of the square. |
| The mouth or stem is cut off | Move or widen the square crop in Photos before importing. |
| Small carved marks merge together | Compare the preview farther toward Hard, or choose a face with broader shapes. |
| Other lights compete with the face | Pick a frame with fewer distracting bright objects in the background. |
Before saving, check three things: the eyes remain separate, the mouth keeps its expression and the outline is visible against the background. If the face is clear but the background feels busy, try a tighter crop. Keep enough of the stem and outer shape to preserve the pumpkin's character.
These checks also work for other Halloween details. A white ghost ornament needs an edge you can see against the background. A dark costume hat is easier to recognize against something lighter. Choose one object with a strong shape and give it room in the square.
What happens to your photo and saved puzzle?
Pixfun converts the photo on your phone without uploading it for that process or using AI credits. The puzzle stays on the device where you make it, without cross-device sync or device backup. Keep the original photograph separately so you can make another version later.
Photo mode keeps the subject and colors in the picture you choose. If you'd like to imagine a pumpkin cottage or a friendly ghost with cocoa, our Halloween pixel art prompt ideas cover creating a new scene in AI Studio.
Download Pixfun on the App Store or Google Play, choose your favorite pumpkin photo and try a close square crop. Watch for the moment the eyes and smile become recognizable little blocks of color, then save the puzzle and start coloring.
Frequently asked questions
Can I turn my Halloween pumpkin photo into a color by number?
Yes. Pixfun Camera mode can turn a photo from your library, or a new camera capture, into a numbered pixel puzzle. Choose a close view with a visible carved face and orange body. The conversion uses the photo you provide; it does not generate a different pumpkin.
Does converting a pumpkin photo use AI credits?
No. Pixfun photo conversion runs on the phone using the existing picture pixels and does not use generative AI or AI credits. AI Studio is a separate route: it creates a new picture from a text prompt, and each generation costs one AI credit.
Where should I crop my Halloween photo?
Crop and recenter it in your phone Photos app before importing if the subject is off-center. Pixfun photo conversion takes a square from the center of the image automatically. Keep the carved eyes, mouth and enough of the pumpkin outline inside that square.
Can Pixfun add a ghost or a witch hat to my photo?
Photo mode converts what is already in the photograph. It cannot add decorations, invent a costume or redraw a dark face. Photograph the objects together if you want them in that puzzle, or use the separate AI Studio to imagine a new Halloween scene from a prompt.
Will my pumpkin photo puzzle sync to another device?
No. Photo puzzles are saved on the device where you make them, without cross-device sync or device backup. Pixfun does not upload the photo for this conversion. Keep your original photograph separately; the saved local puzzle is not a backup of your camera roll.